Same day shipping on orders placed before 10am AEST.

Search

Miko Korean Lash Lift System Starter Kit

4 items left

Description

The Miko by LBLA Korean Lash Lift Kit is a complete 12-product professional system created to give artists more control, consistency and confidence during every step of the lash lift process. Developed in collaboration with Korean lash lift expert Mariola Mikolajczyk to solve the most common artist struggles from over processing to uneven lifts, shield selection to confusing protocols.  

With gentle cysteamine HCL, safer hydrogen peroxide, peptide K-Beauty enriched nourishment and fume-free, the 12-piece kit is all you need to service 15 or more clients. 

This kit includes a full instructions video with step by step by Mariola explaining how to create beautiful Korean Lash Lift with results that last.

Why We Collaborated With Mariola

We wanted to create something the industry did not already have. That is why we collaborated with world-renowned Korean Lash Lift expert Mariola Mikolajczyk to develop a system based on real artist experience, advanced technique, and the common problems she kept seeing in traditional lash lift products. Together, we created a professional kit designed to give artists better control, cleaner results, and a more elevated lash lift experience.

Step 1 and Step 2 System made in Italy 

Product Features

Complete 12-product professional Korean Lash Lift system

  • 15 sachets of Step 1 Softening & Lifting Lotion - Cysteamine HCL + follicle strengthening peptides
  • I5 sachets of Step 2 Neutralizing Lotion- Hydrogen Peroxide + cuticle nourishing peptides
  • 6 x hybrid L-shape shields in XS, S, M, L, XL, XXL
  • Includes compensators and lower lash shields for better control
  • Treatment Primer - Gentle PH neutral solution removes residue before processing
  • Viscosity Gel Controller - thickens Step 1 for cleaner placement
  • Treatment Mask- K-Beauty enriched for deep lash nourishment at step 1,2 & 3 
  • Reusable under-eye pads, flat pads, balm adhesive, processing wraps, micro brushes, and a precision brush
  • Designed to support consistent results across different lash types
  • Amonia Free
  • Vegan & Cruelty Free
  • Professional use only

Formula + Ingredient Highlights

  • Infused with advanced K-Beauty peptide technology + nourishing botanical extracts
  • Free from harsh chemical fumes and strong irritants
  • Neutral pH Treatment Primer helps cleanse without stressing the lash before processing.
  • Cysteamine HCL Step 1 softens the lash structure more gradually for better control.
  • Hydrogen Peroxide Step 2 helps reform and set the new lifted shape.
  • Viscosity Gel Controller thickens Step 1 to help prevent dripping and uneven application.
  • Treatment Mask is made in Korea with skincare-inspired ingredients like sodium hyaluronate, hydrolyzed keratin, hydrolyzed collagen, panthenol, and conditioning oils.
  • Balm Adhesive is water-soluble and enriched with avocado oil, argan oil, jojoba oil, and vitamin E.

Step-By-Step

1

PRE-TREATMENT PRIMER · DISPOSABLE MICRO SWAB
Cleanse & Prime
Apply 1 drop of Pre-Treatment Primer onto a Micro Swab, then gently comb it through the natural lashes from root to tip. This neutral pH formula removes oils, makeup residue, and impurities, allowing solutions to penetrate evenly. Allow lashes to air dry completely before moving to the next step; this is essential for adhesion and lift quality.

✦ Do not skip drying time. Any moisture left on the lash will act as a barrier between the lash and the shield.

2

REUSABLE UNDER EYE PADS
Separate Lower Lashes
Place the Reusable Under Eye Pads smoothly onto the lower lashes; the pads sit on top of the lower lashes, holding them down against the skin. This separates the lower lashes from the upper lashes so you can work freely on the upper lashes throughout the entire service without any interference. Press gently from the inner corner outward to ensure the pad lies flat.

✦ Make sure the lower lashes are fully tucked underneath the pad before you move on. Any lower lashes left free can get caught up in the product during the treatment.

3

ESSENTIALS SHIELD SET
Choose the Right Shield Size
Before applying any product, do a dry fit to find the correct shield size. Place the shield against the eyelid and check how far the lashes reach when wrapped around it; they should reach approximately 60% up the shield. If they reach 60% or higher, the shield is too small—go one size up. If they fall below 60%, the shield is too big—go down a size. Take your time here; the right shield size is the foundation of a clean, even lift. No glue or solutions are used in this step.

✦ The 60% rule is your guide: lashes reaching the midpoint of the shield give you the best root lift and curl definition. Once the size is confirmed, you are ready to move to the next step.

4

PRECISION GRIP FLAT PADS · LIFT BALM ADHESIVE · BOLD LIFT BRUSH #1
Apply Flat Shield & Secure Lashes
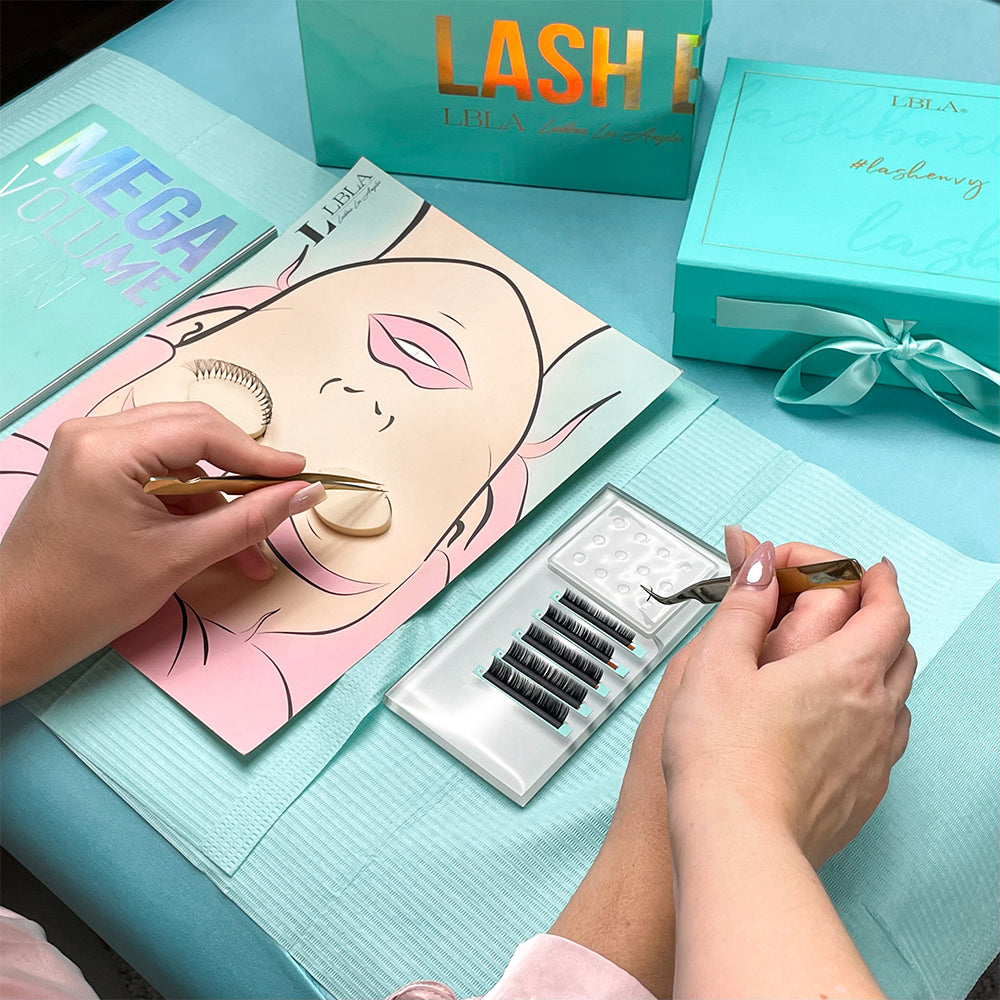
Once the correct shield size is confirmed, set the hybrid shield aside and apply the Precision Grip Flat Pad directly onto the eyelid, positioned 1 mm from the lash line. Using the Bold Lift Brush #1, apply a small amount of Lift Balm Adhesive onto the flat pad. Lift the upper lashes upward and press them firmly onto the flat pad one by one, working from the inner to the outer corner. The thick, slow-setting balm gives you full control to place and adjust each lash before it sets.

✦ The 1 mm gap from the lash line gives the lashes just enough space to bend correctly as they lift onto the pad.

5

STEP 1 LIFTING & SOFTENING LOTION · VISCOSITY CONTROLLER GEL · DISPOSABLE MICRO SWAB · EYE PROCESSING WRAP · STEP 3 TREATMENT MASK
Apply 
Step 1 Lifting & Softening Lotion
Mix a small amount of Viscosity Controller Gel into Step 1 Lifting & Softening Lotion until it holds a triangle shape when lifted on the brush—not runny, not paste-like. Using a Micro Swab, apply the solution to the lashes' roots only. Cover immediately with Eye Processing Wrap to help the formula work evenly. After one minute, remove the wrap and wipe the product away from the tips of the lashes with a clean Micro Swab, leaving it only at the base. Apply Step 3 Treatment Mask to the tips to protect them throughout the remaining processing time. Cover again with a fresh Eye Processing Wrap, making sure the product stays at the base only; if it creeps higher, gently bring it back down with a Micro Swab.

✦ If you add too much Viscosity Controller Gel, the solution becomes too thick and will slow down processing time, so the consistency really matters. The triangle test is your guide: touch the brush to the surface and lift—if it pulls up into a clean triangle point, the texture is right. Adding too little means the product will run and spread where you do not want it.

6

DISPOSABLE MICRO SWAB
Remove Step 1 Lifting & Softening Lotion
Once the lashes are softened and the processing time is complete, remove the Eye Processing Wrap. Using a Micro Swab, gently remove all of Step 1 Lifting & Softening Lotion from the lashes. Work carefully to lift all the product away cleanly. The lashes are now soft and ready to be transferred to the essential hybrid shield.

✦ Take your time and make sure all product is removed before moving on. Any residue left on the lashes can affect how Step 2 Neutralizing Lotion sets the curl.

7

LASH LIFT ESSENTIALS SHIELD SET · STEP 3 TREATMENT MASK · STEP 2 NEUTRALIZING LOTION · COMPENSATORS · LIFT BALM ADHESIVE
Switch to Essential Shield & Apply Step 2 Neutralizing Lotion
Remove the Flat Pad from the eyelid and replace it with the correct size Essentials Shield. Using a small amount of Step 3 Treatment Mask, lift the softened lashes onto the Essential Shield. If the softening phase was done correctly, the lashes will stick easily with just the Step 3 Treatment Mask. If one or two lashes are not holding, use a tiny amount of Lift Balm Adhesive on those lashes only. Once all lashes are positioned on the shield, apply Step 2 Neutralizing Lotion directly from the sachet. Immediately apply the silicone Compensators along the base of the lashes to press them firmly against the shield and prevent any lashes from lifting or popping off during processing.

✦ Use Lift Balm Adhesive for stray lashes only—a maximum of two or three. If most lashes are not holding to the shield, this signals the softening phase may need a little more time next time.

8

DISPOSABLE MICRO SWAB · STEP 3 TREATMENT MASK
Remove 
Step 2 Neutralizing Lotion & Finish on the Shield
Once processing time is complete, remove the Compensators and gently wipe away all Step 2 Neutralizing Lotion using a Micro Swab. Once the lashes are clean, apply Step 3 Treatment Mask along the full length of the lashes while they are still on the shield. This conditions, seals the lash cuticle, and helps the lashes slide off the shield more easily. Once done, gently slide the shield away from the eyelid.

✦ Applying the Step 3 Treatment Mask while the lashes are still on the shield gives you a cleaner finish and makes removal much smoother.

9

REUSABLE UNDER EYE PADS · DISPOSABLE MICRO SWAB
Final Clean-Up & Reveal
Remove the Reusable Under Eye Pads by peeling gently from the outer corner inward. Clean the eye area with water and a Micro Swab to remove any remaining product residue. The treatment is complete.

✦ Advise your client to avoid water, steam rooms, and mascara for the first 24 hours.

PROCESSING TIME REFERENCE

Do not rely solely on the clock.
Actual processing time always depends on the individual client's hair structure and porosity. Use the times below as a guide only. You should begin neutralizing when you visually see the lash has become lighter in color and more flexible—this is your signal, not the timer.

Note: If you are using Lift Balm Adhesive, processing times may vary depending on the amount of balm applied.

LASH TYPE

Thin
Step 1: 6–8 min
Step 2: 5–6 min
Fine, blonde, or previously treated lashes

Medium
Step 1: 8–10 min
Step 2: 6–7 min
Average natural lashes (most common)

Thick
Step 1: 10–12 min
Step 2: 7–8 min
Virgin, coarse, or resistant lashes

How to Check Softness

Every 3–4 minutes, gently lift the Eye Processing Wrap and test a few lashes. They should feel soft and pliable with no resistance when you move them. If not yet fully softened, re-seal the wrap and continue processing.

FAQ

What is a Korean Lash Lift?
A Korean Lash Lift is a professional lash treatment that uses gentler cysteamine-based chemistry, hybrid L-shape shields, and a flat-phase positioning technique to create a dramatic root lift with straighter, elongated lash tips — visibly different from a traditional rounded lash lift.

What's in the LBLA Korean Lash Lift kit?
The kit includes 12 professional products: Pre-Treatment cleanser, Cysteamine Step 1 (15 sachets), Hydrogen Peroxide Step 2 (15 sachets), Texture Gel Controller, Balm Adhesive, 6 hybrid L-shape shields plus compensators and lower lash shields, Nourishing Treatment, reusable under-eye pads, precision flat pads, processing wraps, three precision brushes, micro brushes, and a mixing palette.

How long does a Korean Lash Lift last?
When processed correctly with this system, results typically last through the natural 6–8 week lash growth cycle.

Is this an ammonia-free, cysteamine-based lash lift kit?
Yes. Step 1 uses a cysteamine HCL formula (ammonia-free and TGA-free) for a gentler, more controlled softening phase than traditional TGA-based lash lifts.

Is this Korean Lash Lift kit beginner-friendly?
Yes. Hybrid universal shields, the Texture Gel Controller, slow-setting balm adhesive, and the more forgiving cysteamine chemistry are designed to reduce common beginner mistakes while still delivering advanced-level results.

What's the difference between a Korean Lash Lift and a regular lash lift?
Korean Lash Lift uses cysteamine (vs. TGA), hybrid L-shape shields (vs. rounded), and a flat-phase positioning technique — producing a sharper root lift, straighter elongated tips, and more consistent results.

Why are my lash lifts coming out uneven?
Uneven lifts usually come from poor prep, inconsistent shield placement, or Step 1 not penetrating evenly. The Pre-Treatment removes invisible residue, while the shields, flat pads, brush, and compensators help keep lashes placed cleanly throughout the service.

Why do some lashes lift and others stay straight?
This usually happens when the lashes are not fully cleaned, not fully coated, not fully processed, or not positioned with enough tension and direction. Every lash needs proper prep, full product contact, and secure placement during processing.

How do I stop lashes from crossing or twisting during a lift?
Clean direction starts with placement. The Precision Grip Flat Pads, hybrid shields, Bold Lift Brush, and compensators are included to help separate, straighten, and hold lashes in place so the final result looks clean instead of messy.

Why do lash lift products run into the eye?
Many formulas are too liquid, which makes placement harder to control. The Texture Gel Controller thickens Step 1 into a sticky, workable consistency so the product stays where you place it.

How do I prevent over-processing?
Over-processing usually happens when the product is left on too long, applied too heavily to delicate tips, or used without checking lash condition. Step 1 uses Cysteamine HCL for a more controlled softening process, and the Nourishing Treatment can be used to help protect vulnerable lash tips.

Why do some lash lifts curl back into the eyelid?
This is often caused by using a shield that is too small, too curved for the client’s lashes, or if the lashes are overprocessed. The hybrid L-shape shields are designed to lift from the base while keeping the tips straighter, creating a lifted result without the lashes curling back into the lid.

How do I know which shield size to choose?
Shield choice depends on lash length, eye shape, and the desired result. As a general rule, lashes should not cover the entire shield. If the shield is too small, the lashes can overcurl. When in doubt, sizing up can help create a cleaner, more elongated lift. Recommend doing a dry lift test to ensure perfect shield size.

Why does my client’s lift drop too quickly?
A lift can relax too soon when Step 1 was under-processed, Step 2 was not applied thoroughly, or the lashes were not fully neutralized. Every lash treated with Step 1 needs complete Step 2 coverage to lock in the new shape.

Why do lash tips look frizzy after a lift?
Frizzy tips are usually a sign of over-processing, especially on fine, dry, or previously lifted lashes. Avoid leaving Step 1 on fragile tips too long and use the Nourishing Treatment to help condition and protect the lashes.

Can I use this on stubborn, straight, or downward-growing lashes?
Yes. The system was created to help artists work with challenging lash types, including straight, resistant, and downward-growing lashes. Processing time, shield choice, and placement should always be adjusted to the client’s natural lashes.

Do I need to use the Balm Adhesive on every client?
No. The Balm Adhesive is helpful for beginners, stiff lashes, or lashes that do not stay positioned easily. Use it when you need extra control, not as an automatic step for every service.

Why is the Nourishing Treatment important?
Chemical processing can temporarily affect lash condition. The Nourishing Treatment helps hydrate, condition, and soften the lashes after processing, and it can also be used during the service to help protect delicate tips.

How much should I charge for this service?
This should be positioned as a premium lash lift service, not a basic add-on. Depending on your area, experience, and service experience, many artists can charge $120–$200+ per service.

How can this service help me make more money?
Lash lifts are high-demand, lower-maintenance services with strong client appeal. Because this system is designed for visible, premium results, artists can use it to attract new clients, upgrade existing clients, and add a profitable service to their menu.

What to do if lashes become over-processed during the service?
If you notice signs of over-processing (excessive softness, loss of structure, or frizzing), you can gently relax the lashes and repeat the service with a shorter processing time. Work conservatively and closely monitor how the lashes respond before proceeding further.

IF A CLIENT ARRIVES WITH OVER-PROCESSED LASHES?
Focus on restoring the health of the lashes before performing another lift.
Apply a nourishing lash mask and leave on for 5 minutes. For deeper penetration, cover with cling film during processing. Avoid re-lifting until the lashes regain strength and elasticity.

Why your lash lift may look underwhelming (or lack curl)? 

If your results feel soft, straight, or not lifted enough, it typically comes down to technique or processing:

  • Under-processing
    The lashes did not process long enough. You’ll often notice this if the lashes are lifting or popping off the shield, rather than holding their shape.
  • Improper eyelid tension or placement
    Pulling or over-stretching the eyelid can cause the waterline to shift onto the shield, preventing the lashes from wrapping properly. This results in a straighter, less defined lift.
  • Incorrect shield selection or placement
    Using a shield that is too large, or placing it too far from the lash line, reduces the lift at the base, leading to a weaker overall curl.